Welcome to the 6th post of the 6M Challenge of Bug Bounty edition where you are going to setup, and play with Bramhastra of Bug Hunting and Pentesting in general – BURP SUITE. I hope that you have finished the tasks given in the previous post, i.e.:
- Learn about different types of bugs in detail from Youtube or our Instagram Page.
From previous posts, do you remember HTTP requests? If you don’t, it means you’ve been not following this series of articles or haven’t completed the given tasks. If you haven’t, please do it.
understanding the hTTP
Now, every time you load a web page, or click on a button on some web page to execute some action, or request some page, image, video, or any resource from the web server, an HTTP request will be sent from your browser to the server. This request contains basic info like details about your browser, info about what you need from the server, or info about what you want the server to do for you.
In order to play with web applications, test and diagnose them like a doctor. We gonna play with these HTTP requests, which are building blocks of the internet, and that is why we use this software called “Burp Suite“. There is other software of the same league too, but burp suite is the most popular one.
How does the burp suite work?
Once you setup the burp suite with your browser, every single HTTP request which you send from your browser, could be intercepted in the Burp Suite software, which means, you’ll know the exact information that your browser is sending to the server. And that is the biggest vector and the biggest surface to find bugs with/on.
It’s like, someone called “A” sends a secret letter to “B”, now if you grab that letter before it reaches B, you can make a lot of manipulations with that letter, to make both A and B work as you want them to. So… this is what we’re gonna do here.
downloading the burp suite
Good news: We can install Burp Suite on Windows too. So, download and install it from HERE.
Now here I’m making you install an older version(1.7.36) on Windows because old versions of BurpSuite have a feature that ain’t present in the newer version (unless you buy the paid version of the software).
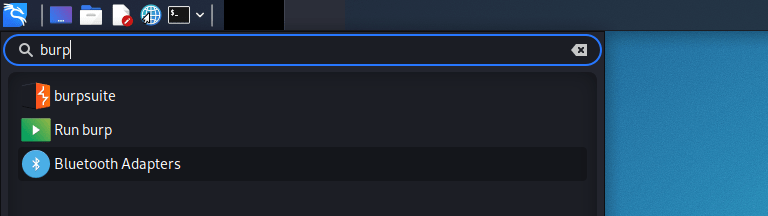
If you’ve Kali Linux, you have Burp-suite pre-installed, just search burp suite in the search box at the top left corner. Although, as Kali has the latest version of Burp Suite, you might miss one feature of the older version, we could solve this problem later. Let’s get to the setup.
Download and install this one – https://portswigger.net/burp/releases/professional-community-1-7-36
configuring with the browser
We need to connect Burp with your browser. I prefer firefox for pentesting, so I’ll show you how to set up Burp with firefox. If you use other browsers, just google a tutorial for that particular browser.
- Open the burp suite software and select the temporary project. Click on next, select default settings, click on “Start Burp”.
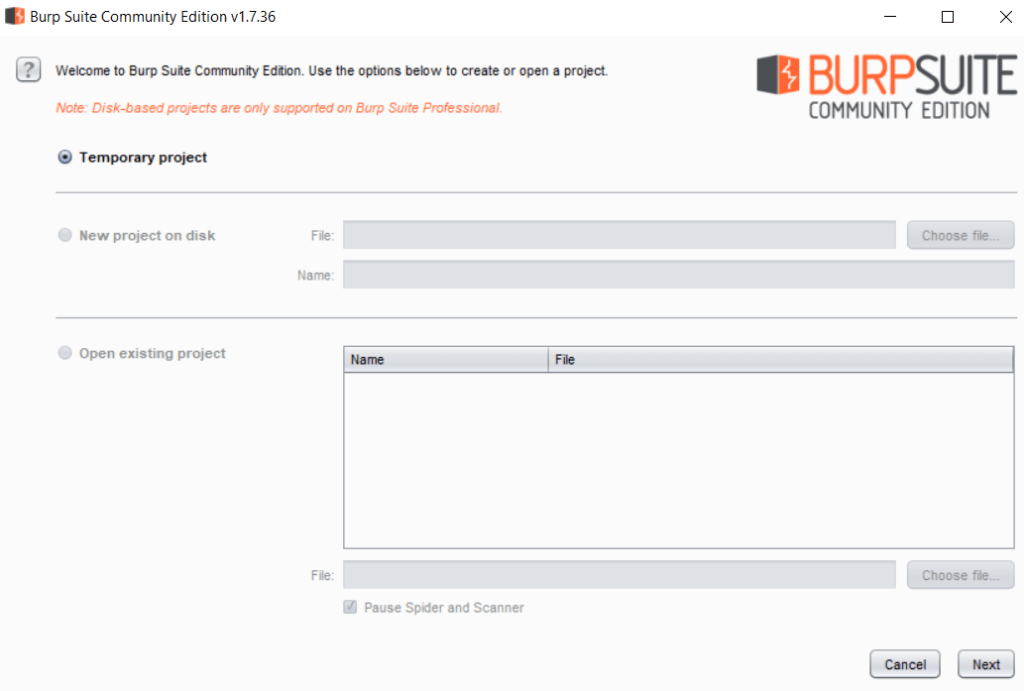
A screen like this will appear.
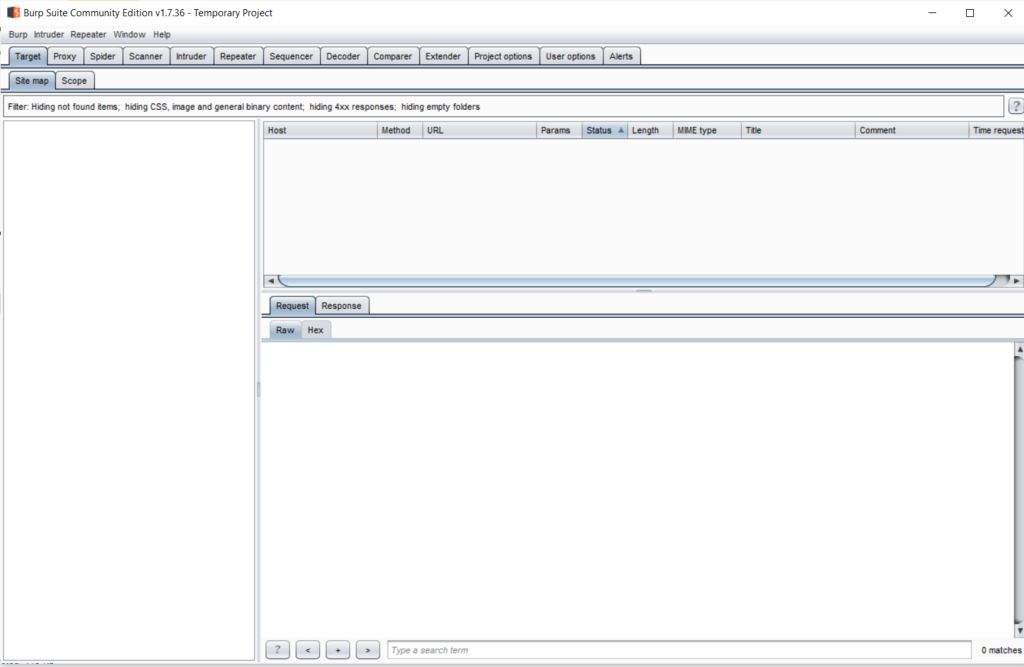
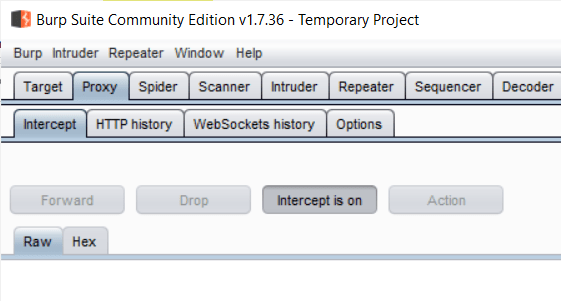
- We’ll learn about all these buttons and tools soon, but first, click on the “Proxy” button. Click on the button “Intercept is off”, which will turn it on.
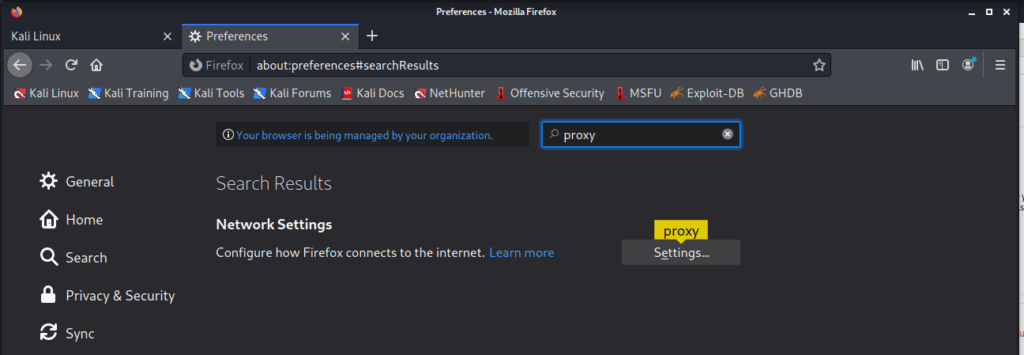
- Now open Firefox, type “about:preferences” in the address bar (without quotes), and hit enter. Search “Proxy” in the search box as shown in the photo, click on the “Settings” button given there.
Such a screen will appear.
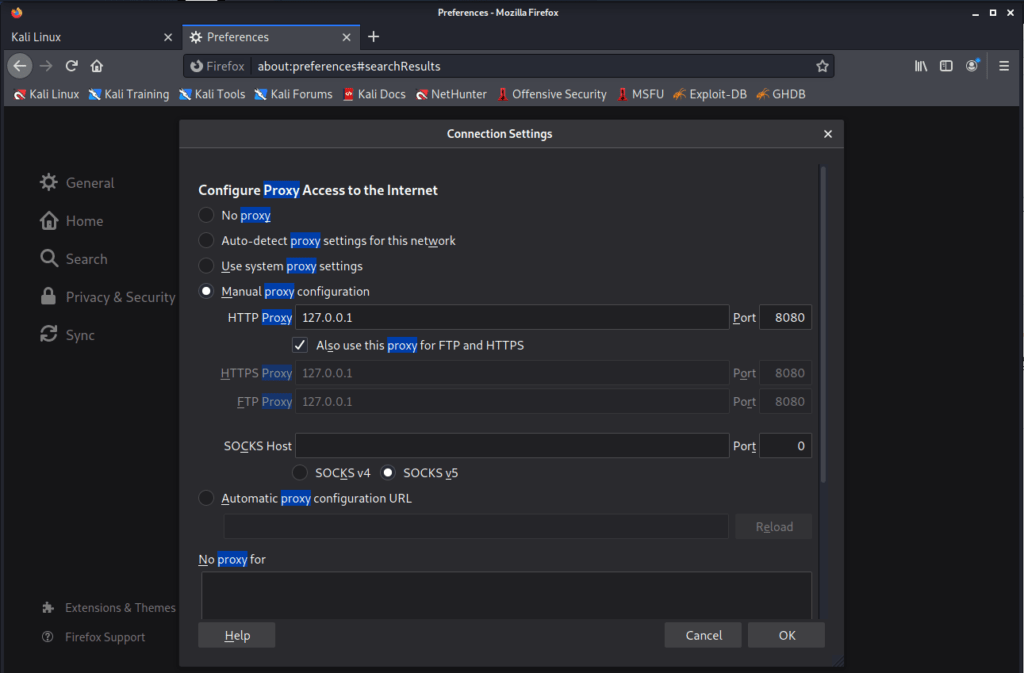
- Click on “Manual Proxy Configuration“, fill “127.0.0.1” in “HTTP Proxy” field, and “8080” in the port field. Check the box against ‘Also use this proxy for FTP and HTTP’ and Click OK.
- Close this tab, open a new tab in the same browser. Type ‘http://burp‘ and hit enter.
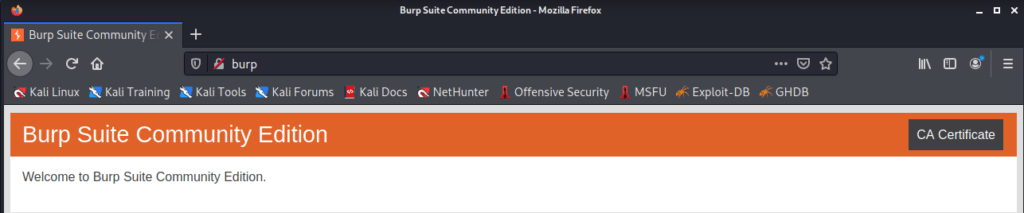
- Click on the “CA Certificate” on the top right, and download the given certificate. Next, type “about:preferences” and hit enter.
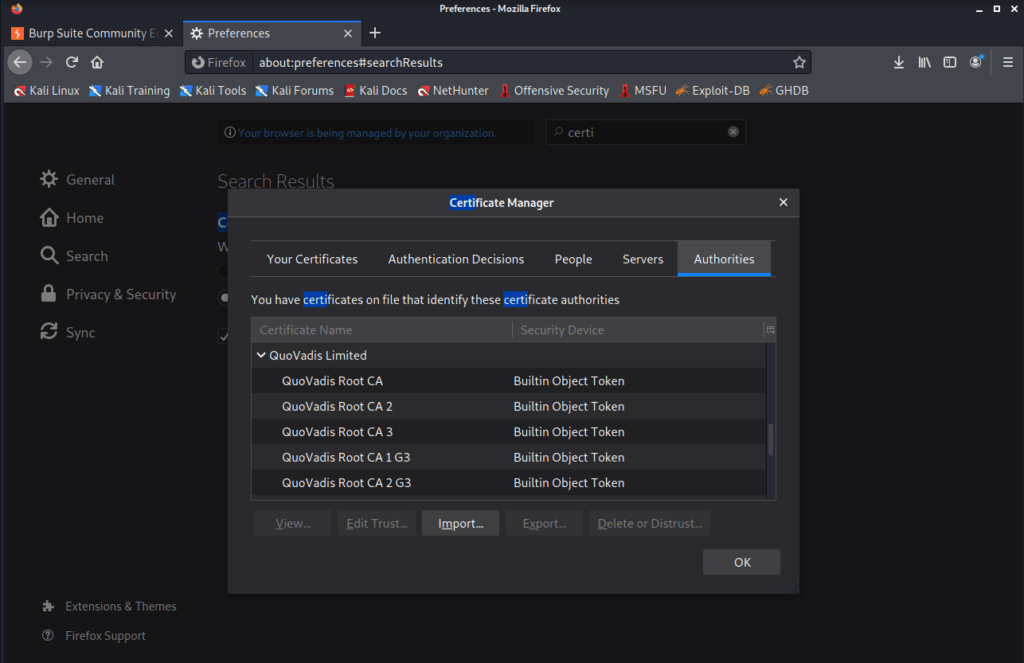
- Search “Certificates” in the search bar again, click on the “View certificates” button. Click on the import button as shown below. Select your newly downloaded ‘cacert.der’ file from your downloads folder.
- Check these two boxes – ‘Trust this CA to identify websites and ‘Trust this CA to identify email users’, and click OK.
And, this is it. Burp Suite is ready to use with our browser. Congrats! our Brahmastra has been loaded and ready.
Make sure ‘Intercept is on’ in your burp suite Proxy tab, then go to your browser, and type anything and hit enter.
I typed ‘a simple google search in my browser and hit enter, and this is what I see in my Burp window, which means my HTTP request to google has been intercepted successfully by Burp Suite.
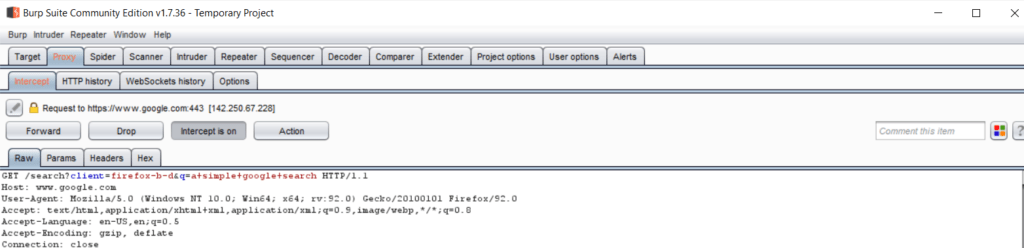
Now you can click on the ‘Forward’ button to allow the request to reach the servers of google.com, or you can just click on the ‘Intercept is on’ button and turn it off, which will make your browser behave like it normally would.
Note: Once you’re done with a pentesting session, go to the ‘proxy’ settings of your browser by searching ‘proxy’ on about:preferences page like we did above. Now select ‘No Proxy’ and click on OK to make things normal as they used to be, to surf the internet normally.
That’s all for today’s post. Let’s head on towards tasks:
tasks to be completed:
- Download and install the Burp Suite if you are on windows
- Configure burp suite for your browser.
- Test the configurations.
Okay, goodbye for now, see you in the next post.